Deep production knowledgeAdvanced Printing Production Notes
The details below help buyers evaluate printing beyond surface-level method descriptions.
1. Design for the production surface
The decoration system should be engineered as part of the garment rather than chosen after the product is finished. A garment is not a flat sheet of paper. Rib, fleece nap, seams, pockets, drawcords and zippers create pressure differences and positioning limits. Strong artwork can be adapted around those realities without losing its identity. During development, map the printable zone from garment measurements rather than scaling a mockup by eye. This also protects consistency when a design is graded across sizes. This principle applies across digital, screen-based, transfer and special-effect methods, although the production solution will differ.
2. Separate visual size from ink coverage
The decoration system should be engineered as part of the garment rather than chosen after the product is finished. Two graphics with the same outer dimensions can have very different production cost and feel. A thin-line illustration may cover only a small percentage of the area, while a solid rectangle fills nearly all of it. When comparing quotes, state both the finished dimensions and show the final artwork. This prevents a supplier from pricing a low-coverage draft and then changing the price after the final file arrives. This principle applies across digital, screen-based, transfer and special-effect methods, although the production solution will differ.
3. Use placement tolerances that reflect sewing reality
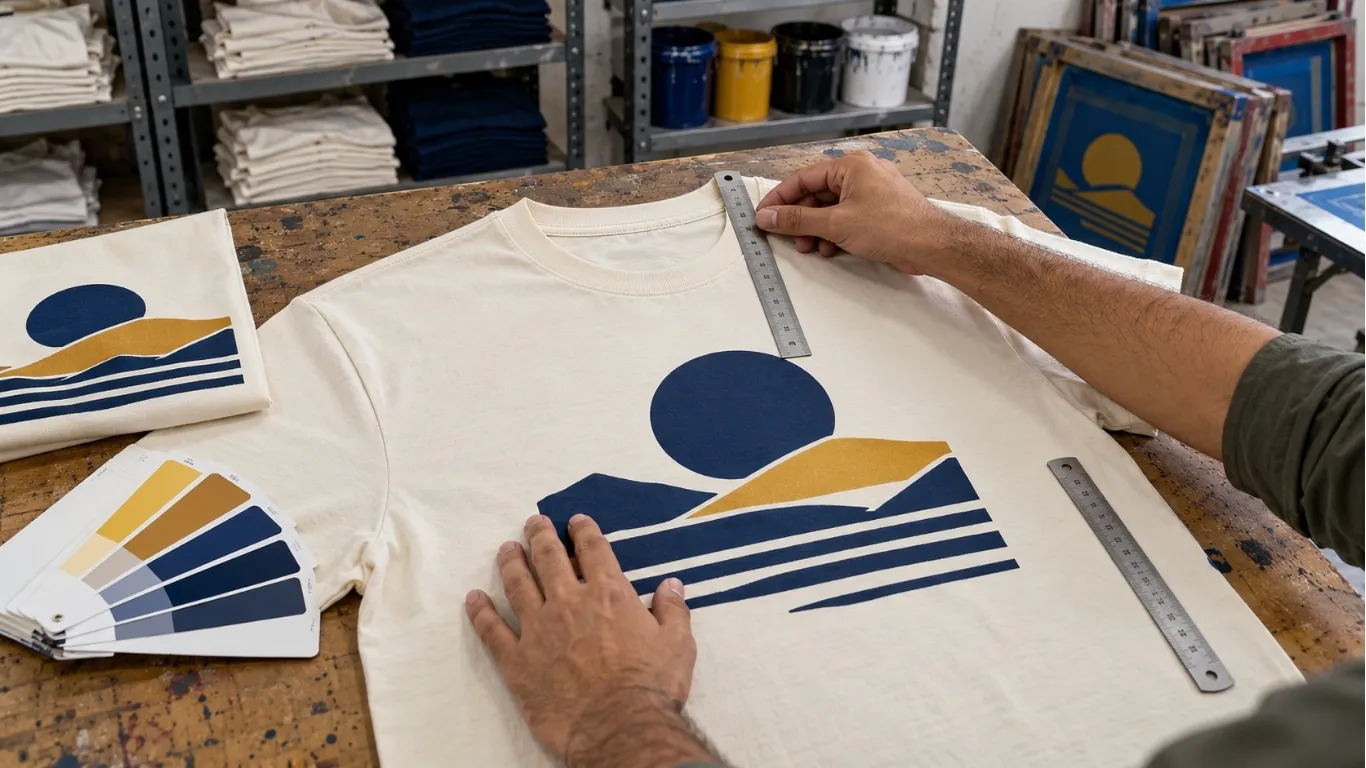
The decoration system should be engineered as part of the garment rather than chosen after the product is finished. Garment panels move slightly during sewing and finished garments are not identical rigid objects. For production, measure decoration from repeatable reference points such as center front, neck seam, side seam or pocket edge, and agree a reasonable tolerance. Overly precise instructions that ignore normal garment variation can create unnecessary rejects without producing a visibly better product. This principle applies across digital, screen-based, transfer and special-effect methods, although the production solution will differ.
4. Plan dark garments before light garments
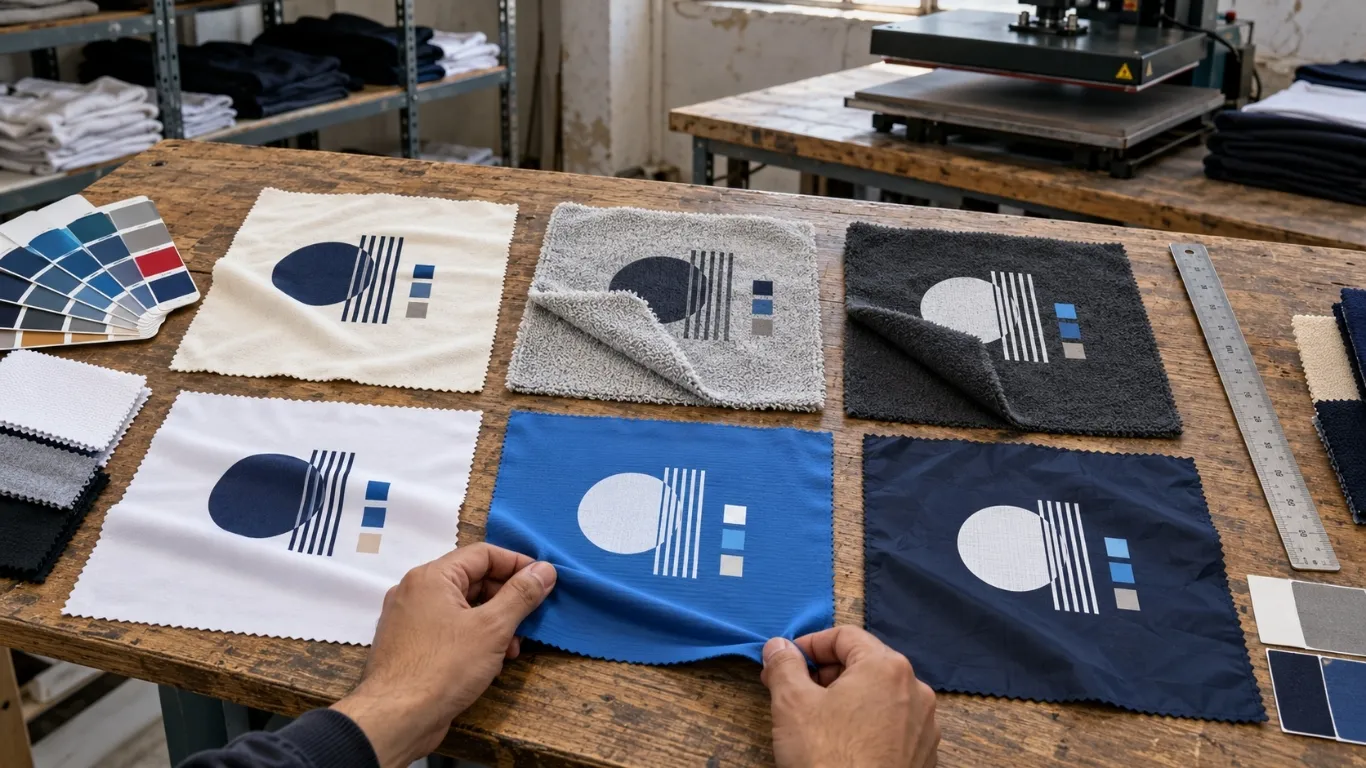
The decoration system should be engineered as part of the garment rather than chosen after the product is finished. Dark bases often require an underbase, blocker, extra white, different pretreatment or additional cure control. This can change hand feel and cost. A collection that uses one graphic across white, black and polyester colorways should be tested as separate production conditions rather than assuming the light-garment recipe can simply be copied. This principle applies across digital, screen-based, transfer and special-effect methods, although the production solution will differ.
5. Control color with physical standards
The decoration system should be engineered as part of the garment rather than chosen after the product is finished. A hex code is designed for screens, not textile ink. For important brand colors, use a physical target or a standardized color reference and approve a real strike-off. Record the approved mix or digital workflow with the fabric article. This is especially important when a reorder may happen months later or when the same logo appears across print, embroidery, labels and packaging. This principle applies across digital, screen-based, transfer and special-effect methods, although the production solution will differ.
6. Sample the combination, not only the components
The decoration system should be engineered as part of the garment rather than chosen after the product is finished. A fabric swatch can pass, and a print on another fabric can pass, yet the final combination can still fail. Heat response, stretch, surface finish and dye behavior are specific to the actual garment material. A reliable sample uses the production fabric, production color, intended decoration method and realistic artwork coverage. This principle applies across digital, screen-based, transfer and special-effect methods, although the production solution will differ.
7. Cost the whole decoration program
The decoration system should be engineered as part of the garment rather than chosen after the product is finished. Brands often compare only the headline price per print. A better calculation includes setup, films or screens, multiple placements, special effects, sampling, expected reject allowance, labels and any added production time. Once these are combined with the garment and freight, the brand can compare landed unit economics rather than isolated print charges. This principle applies across digital, screen-based, transfer and special-effect methods, although the production solution will differ.
8. Keep a golden decoration reference
The decoration system should be engineered as part of the garment rather than chosen after the product is finished. When a print is approved, retain a physical sample with the final dimensions, placement, color and hand feel. Photographs are valuable for communication but cannot show texture or opacity accurately. A retained approved sample gives production and quality teams a concrete standard during reorders and helps resolve disagreements objectively. This principle applies across digital, screen-based, transfer and special-effect methods, although the production solution will differ.
9. Think about retail use before choosing a finish
The decoration system should be engineered as part of the garment rather than chosen after the product is finished. A display piece, gym garment, children’s item, uniform and streetwear hoodie experience different abrasion, stretch, washing and heat. Method choice should match the end use. The most visually dramatic sample is not automatically the best production decision if it becomes uncomfortable, difficult to wash or inconsistent at scale. This principle applies across digital, screen-based, transfer and special-effect methods, although the production solution will differ.
10. Avoid unsupported sustainability claims
The decoration system should be engineered as part of the garment rather than chosen after the product is finished. Water use, energy, chemistry, transfer waste and garment longevity all matter. A method name alone does not prove that a finished product is environmentally preferable. If sustainability is part of marketing, request specific documentation for inks, fabrics and processes and use narrow factual language instead of broad claims that cannot be substantiated. This principle applies across digital, screen-based, transfer and special-effect methods, although the production solution will differ.
11. Document changes between sample rounds
The decoration system should be engineered as part of the garment rather than chosen after the product is finished. If the print width, placement, ink, garment color or fabric changes, update the written specification immediately. Do not rely on a chat message buried in a long thread. Versioned artwork and a short approval log help prevent an earlier file from being used accidentally during bulk production. This principle applies across digital, screen-based, transfer and special-effect methods, although the production solution will differ.
12. Design a scalable decoration system
The decoration system should be engineered as part of the garment rather than chosen after the product is finished. A method that works beautifully for ten pieces may become slow or costly at one thousand, and a high-setup method can be inefficient for frequent tiny drops. If the brand expects growth, discuss the likely volume path early. Sometimes the right strategy is to launch with one process and deliberately convert to another after the artwork and demand are proven. This principle applies across digital, screen-based, transfer and special-effect methods, although the production solution will differ.
24 buyer decisionsBuyer Production Workbook
This workbook turns decoration selection into a practical product-development checklist. Work through the decisions before bulk approval and keep the final answers with the style specification.
1. Define the product before the decoration
Start with the garment silhouette, fabric composition, GSM, color and intended retail position. Decoration should support a product that already makes sense. If the base garment is still changing, every sample can become obsolete because surface texture, shrinkage, color and seam position affect the approved result. Lock the important garment variables first, then compare decoration routes against the same product. This creates a useful sample instead of a moving target and makes supplier quotations comparable.
2. Set the real artwork size
Mockups often make graphics look proportionally correct without stating dimensions. Convert the visual concept into finished width and height on the garment. Check the smallest and largest garment sizes so one placement does not become oversized on XS and undersized on 3XL. Decide whether all sizes use one physical dimension or whether artwork scales by size group. Write that decision into the technical specification before sampling.
3. Choose repeatable placement references
Measure from construction points that exist consistently in production: neck seam, center front, shoulder seam, pocket edge or side seam. Avoid instructions such as “a little lower” or “centered like the mockup.” A supplier needs a numeric target and a sensible tolerance. For asymmetrical garments, confirm whether placement follows the garment center, panel center or a visual feature. These small decisions prevent drift across a run.
4. Separate color approval from monitor color
A phone or laptop is useful for communication but should not be the final authority for brand-critical color. Device brightness, color profile and ambient light change what a digital preview looks like. Use a standardized reference or a physical approved sample when color is important. Record the target together with the garment base color because identical ink or transfer output can appear different on white, cream, black or saturated fabric.
5. Plan dark colorways independently
A design that works on a white garment may need an underbase, blocker, extra white layer or different material on black. That can change feel, opacity, cure conditions and cost. Treat light and dark colorways as separate production conditions even when the visible artwork is identical. If the collection uses several dark colors, test the most technically difficult fabric first instead of assuming one approved result covers the entire palette.
6. Decide how much surface coverage you really need
Large solid areas can make a garment hotter, stiffer or more expensive and can increase production risk. Negative space often improves comfort while preserving visual impact. Before approving a large block graphic, compare a full-solid version with a version that lets the fabric show through. This is a design decision as much as a factory decision. The best result balances visual weight, tactile feel, durability and realistic manufacturing control.
7. Use the sample to prove the exact combination
A fabric swatch, an artwork proof and a decoration test on another garment are not equivalent to a finished production sample. The valuable test uses the intended fabric article, garment color, construction and full-size artwork. That sample shows interaction between heat, pressure, stretch, seams and surface finish. Keep it after approval because it becomes the physical reference that future bulk work and reorders can be judged against.
8. Ask what changes at higher volume
A method that is convenient for a ten-piece launch may not be the most efficient route at several hundred units. Ask the supplier how setup, machine speed, material handling and labor change as quantity grows. If a later conversion to another route could preserve appearance while improving unit economics, plan that transition in advance and retain the approved visual target. Growth should not force the brand to rediscover its decoration standard from zero.
9. Cost every placement separately
Front, back, sleeve, hood, leg and pocket work each add handling. Difficult positions can also require special pallets, manual alignment or slower production. When a quotation bundles everything into one unexplained amount, it is hard to optimize. Request a breakdown by placement so you can decide which element creates enough visual value to justify its cost. Removing one low-impact placement can sometimes protect margin without changing the identity of the product.
10. Model landed cost instead of decoration-only cost
A low decoration price can be misleading if the garment, labels, packaging, freight or duties are excluded. Build one landed unit calculation using the same assumptions for every supplier. Include sample development and setup when estimating the first run, then model reorders separately because setup may change. This view helps a brand set retail price and gross margin before production rather than discovering after delivery that the collection cannot support its planned marketing or wholesale structure.
11. Agree what counts as a defect
Quality discussions are easier when appearance standards are written before bulk work. Define obvious reject issues such as peeling, incomplete cure, severe misplacement, contamination, broken fine detail or color outside the approved tolerance. Also distinguish normal textile variation from actual defects. A garment is flexible material, not a machined metal part. Reasonable tolerances protect quality while preventing arguments over tiny variation that customers would never notice.
12. Test the product after care
A decoration should be evaluated after the garment has been washed and dried in a realistic way. Check adhesion, cracking, fading, migration, stretch recovery and surface feel. If a special effect is central to the design, verify that the effect remains visible after care. Use the result to create the final care-label recommendation for the complete item. Do not assume a generic wash instruction is correct for every combination of fabric, trims and decoration.
13. Keep a controlled approval trail
Name files clearly and record which version is approved. A supplier should not have to search through dozens of chat images to guess whether V2 or V5 is final. Store artwork, dimensions, placement notes, color references, sample photographs and approval date together. When a change is made, supersede the old specification. Good version control is inexpensive and prevents one of the most common causes of production mistakes: using an earlier file that still looks plausible.
14. Design around garment construction
Pockets, zippers, drawcords, ribs, seams and thick hems create uneven surfaces. A decoration placed directly over them may lose pressure, distort or become difficult to align. During design, mark these construction features on the flat sketch and decide whether the graphic avoids them, intentionally crosses them or is applied before sewing on a flat panel. Planning around construction produces a cleaner result than forcing a finished-garment process into a location it cannot handle consistently.
15. Plan for size grading
A fixed 30 cm graphic can dominate a small garment and look modest on a very large one. Decide whether the collection accepts that difference or uses multiple artwork sizes. If scaling is required, define size groups and separate production files. Avoid uncontrolled “scale proportionally” instructions because placement, line weight and legibility can change when artwork is reduced. The brand should approve the smallest version as carefully as the hero sample size.
16. Protect fine text and negative space
Small counters inside letters, thin outlines and tight gaps are vulnerable in many textile processes. What is legible at 200 percent zoom may close or blur on fabric. Print the artwork at physical size on paper as a first check, then ask the supplier about minimum feature size for the chosen system. If detail must be simplified, preserve the visual hierarchy and brand character rather than waiting for production to simplify it accidentally.
17. Use special effects selectively
Raised, reflective, metallic and other effects attract attention because they are different from the base surface. Using them everywhere can make a garment heavy, expensive or visually noisy. Decide which part of the artwork benefits most from the effect and keep supporting elements simpler. This also reduces process complexity and makes quality easier to control. A small technical accent can communicate premium development more effectively than covering the entire design with a special material.
18. Evaluate comfort as part of quality
Customers experience the inside and outside of a garment. Large surface films, thick deposits or stiff areas can affect drape and breathability even when the artwork looks excellent in a photo. For products worn during exercise or in warm climates, comfort deserves extra weight in the method decision. Try the finished sample on a body, move in it and feel the decorated area from the inside. Product quality includes wear experience, not only visual sharpness.
19. Think about production sequence
Decoration can happen on fabric, cut panels or finished garments. It may also interact with garment dye, washing, embroidery and heat-sensitive trims. The order of operations changes risk. For example, a wash after decoration can distress a graphic, while a decoration after a wash must cope with the final treated surface. Map the sequence during sampling and keep it the same in bulk unless a deliberate change is approved. Sequence is part of the production recipe.
20. Plan personalized names or numbers separately
Personalization introduces file management and sorting risk even when the base artwork is unchanged. Provide a clean data list, consistent spelling rules, size mapping and a proof process. Decide what happens if a name is unusually long and whether numbers have fixed height. After production, personalized pieces should be checked against the order data before packing. The more unique units in a run, the more important controlled labeling and bundle tracking become.
21. Check packaging contact with the decorated surface
Freshly finished decoration can be damaged by excessive heat, pressure or folding if it is packed too soon. Some raised or tacky surfaces can mark when pressed against another garment. Confirm that finished pieces are cooled or cured fully before folding and that the fold line does not permanently crease an important graphic. Packaging is the final part of production, and careless packing can damage work that passed every earlier quality check.
22. Prepare a reorder package
A reorder should begin with the archived approved specification, not a new interpretation of an old photo. Keep the garment pattern/version, fabric article, artwork file, dimensions, placement, color reference, decoration system and approved sample linked under one style code. If any component is unavailable, identify the substitution before production and test it. This approach shortens communication and gives the factory a clear standard to reproduce instead of asking the team to remember what happened months earlier.
23. Make claims only as strong as the evidence
Avoid promising lifetime durability, safety performance, sustainability or exact wash counts unless the finished product has evidence that supports the statement. Marketing language should match the actual material and test conditions. A decorative reflective effect, for example, is not automatically certified safety equipment. Clear claims protect the brand and also make supplier conversations more precise because everyone knows what performance must actually be demonstrated.
24. Review the first production pieces in context
Do not judge the first approved bulk piece only under factory lighting. Look at the complete garment, check it on-body when possible, and compare it with the approved sample. Confirm labels, seam alignment, garment shade and decoration together. If the product will be photographed for e-commerce, consider how the effect behaves under studio light as well. A technically acceptable detail can still look wrong when the whole garment is viewed as a retail product.
25. Build a launch sample scorecard
Score the approved sample against the things that matter to your brand: artwork accuracy, placement, color, feel, comfort, wash result, garment fit, label quality and landed cost. Use a simple pass/fail or weighted score rather than relying on excitement when the first physical piece arrives. If two suppliers are being compared, apply the same scorecard to both. This creates a record of why a sample was approved and helps future team members understand which characteristics are non-negotiable.
26. Use a change budget during development
Every new colorway, artwork version, placement or special effect adds development time and possible setup. Set a deliberate limit on how many variables can change after the first sample. When feedback arrives, group revisions into one controlled round instead of sending daily micro-changes. This shortens the approval loop and reduces the chance that one correction is built on an outdated version. A disciplined change process also makes it easier to understand which revision caused an improvement or a new problem.
27. Plan photography with the physical effect
Raised, glossy, matte and reflective surfaces can behave very differently under e-commerce lighting. Before campaign production, photograph the approved sample under the type of light your brand will use. Check whether highlights hide detail, whether reflective elements flare too strongly and whether dark-on-dark work remains visible. This does not change factory quality, but it can change how the customer perceives the product online. Product development and content production should therefore share the same approved reference rather than working from separate mockups.
28. Keep supplier questions specific
A useful technical question names the garment and risk: “Will this black polyester bleed into the light graphic at your normal cure temperature?” is better than “Is this method durable?” Specific questions encourage specific evidence such as a strike-off, wash test or material data. Ask the supplier what it would test, what failure would look like and what alternative it would recommend if the first route fails. This turns sourcing into collaborative problem solving and makes vague sales answers easier to identify.
29. Set a deadline backward from launch
The decoration stage needs room for art review, sampling, approval, bulk work, quality checks and possible correction. Work backward from the campaign or retail launch date and reserve a buffer rather than scheduling every step at the fastest theoretical speed. If a special material has to be ordered, include its lead time before promising a launch publicly. A realistic calendar gives the brand the freedom to reject a poor sample without immediately creating a crisis.
30. Review margin again after the sample
The first accurate cost often appears only after fabric, artwork size, placements and finish are finalized. Recalculate the landed unit cost at that point and compare it with the planned retail and wholesale prices. If margin is too thin, simplify the product before bulk approval rather than hoping sales volume will fix the economics later. Adjusting one low-value placement, fabric option or packaging component at sample stage is usually less painful than discounting a finished collection that was expensive to produce.
For broader technical background, see the textile decoration overview as an external reference, then validate the actual method with your production supplier and fabric.