Factory-Direct MOQ from 10 Samples in 7–10 Days Worldwide DDP Shipping
Get a Quote →
Apparel Decoration Knowledge Hub · Updated October 6, 2026

Printing Methods for Clothing: Cost, MOQ & How to Choose

Printing is not one process. This hub compares screen printing, DTF, DTG, sublimation, puff, water-based and reflective methods so clothing brands can choose by fabric, artwork, quantity, hand feel and cost.

7Methods compared
10 MOQPer color per style
1 HubFull topic cluster
2026Updated guide

Printing should be chosen with the garment, not after it. Fabric composition, garment color, artwork coverage, order quantity and end use change which process makes sense. This page is the parent guide for our complete clothing printing series.

Quick answer: which printing method should you choose?

Use screen printing for repeat spot-color work, DTF for flexible full-color transfers, DTG for photographic cotton-rich work, sublimation for polyester all-over graphics, puff for raised effects, water-based for selected soft-hand work and reflective printing when returned-light visibility is part of the design.

The cluster

Clothing Printing Methods Explained

Printing changes how a garment looks, feels, washes and costs. The right method depends on the fiber, garment color, artwork, number of placements, intended quantity and the visual finish your brand wants. These guides separate those decisions so a startup can compare methods before it pays for a sample.

Screen Printing

Screen Printing

Ink is pushed through a prepared mesh stencil onto the garment, one controlled layer or color at a time.

Best for: bold logos, spot colors, streetwear graphics and repeat production.

Fabric: Excellent on cotton; workable on blends, fleece and tested polyester.

DTF Printing

DTF Printing

Direct-to-film printing creates a printed transfer on film, adds an adhesive powder layer, cures it, then heat-presses the finished transfer onto the garment.

Best for: multi-color artwork, detailed logos, short runs and mixed fabric programs.

Fabric: Versatile across cotton, blends and many tested synthetics.

DTG Printing

DTG Printing

Direct-to-garment printing uses a textile inkjet printer to print water-based ink directly onto a prepared garment rather than making a separate transfer.

Best for: photographic artwork, gradients, short runs and cotton-rich garments.

Fabric: Best on cotton-rich surfaces; synthetics need specialized systems and testing.

Sublimation Printing

Sublimation Printing

Dye-sublimation uses heat to turn printed disperse dye into gas so it bonds within polyester fibers instead of sitting as a separate ink film on top.

Best for: all-over sportswear, jerseys, performance apparel and permanent full-color polyester graphics.

Fabric: Best on white or light, high-polyester fabric.

Puff Printing

Puff Printing

Puff printing is a raised screen-print effect in which a heat-reactive ink or additive expands during final curing to create a dimensional surface.

Best for: streetwear logos, bold type, selected details and tactile raised graphics.

Fabric: Works well on stable cotton-rich garments after cure testing.

Water-Based Printing

Water-Based Printing

Water-based printing uses an ink system in which water is a major carrier, allowing pigment and binder to create a print that can feel softer and more integrated with suitable fabric.

Best for: soft-hand cotton streetwear, fashion graphics and designs where fabric feel matters.

Fabric: Strongest on suitable cotton-rich fabrics; discharge performance depends on the garment dye.

Reflective Printing

Reflective Printing

Reflective printing adds a surface designed to return more light toward a directional light source, creating a bright flash-like effect compared with its normal daylight appearance.

Best for: streetwear accents, logos, night-visibility fashion details and contrast effects.

Fabric: Works on many garments after adhesion, heat and migration testing.

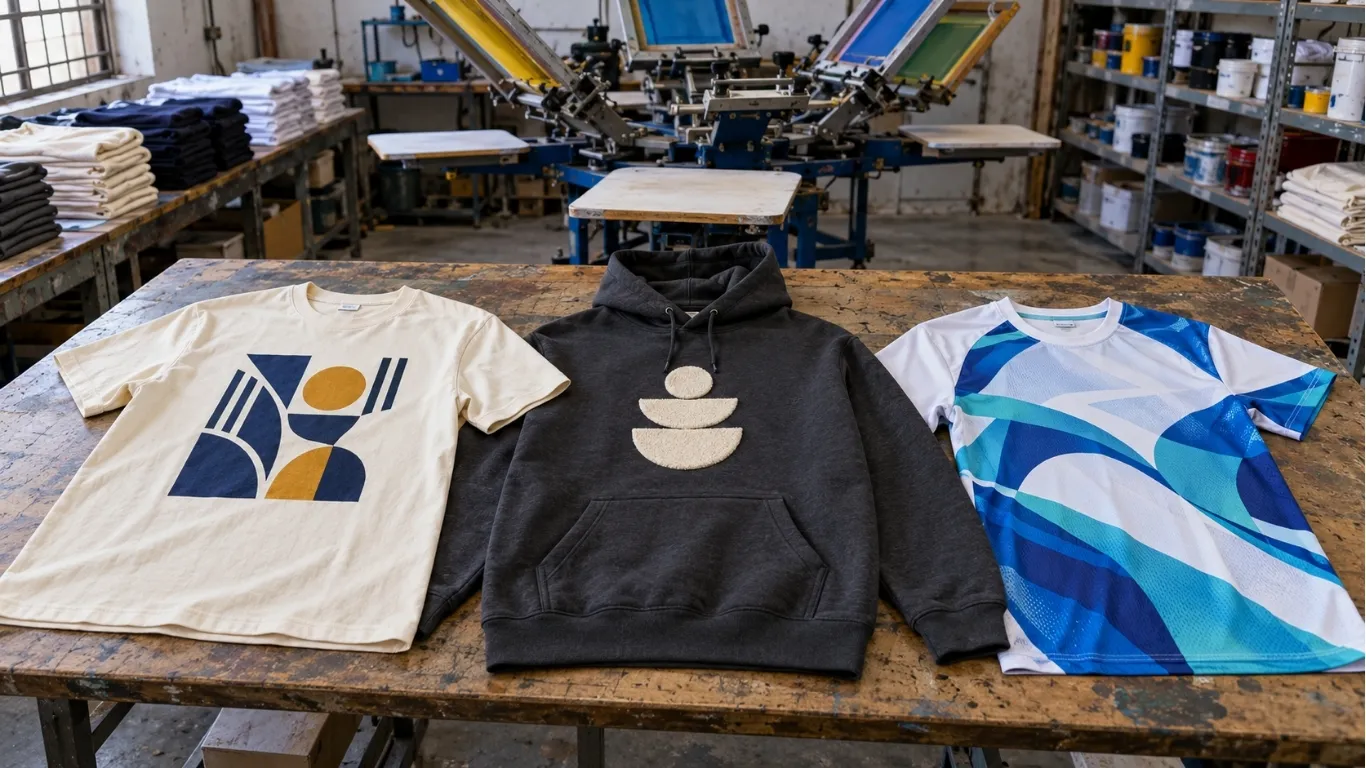
Printing comparison of printed t-shirts hoodies and performance garments for custom clothing production
comparison of printed T-shirts hoodies and performance garments.
Side by side

Printing Method Comparison

This printing comparison is deliberately practical. It does not label one process “best” for every job. Instead, it shows where each method usually fits and which variable should be tested before production.

MethodBest fitFabric fitOrder economicsTypical hand
Screen Printingbold logos, spot colors, streetwear graphics and repeat productionExcellent on cotton; workable on blends, fleece and tested polyesterBest economics usually improve as quantity risesFrom soft to substantial depending on ink system and deposit
DTF Printingmulti-color artwork, detailed logos, short runs and mixed fabric programsVersatile across cotton, blends and many tested syntheticsFlexible for small and medium runs; nesting can improve film efficiencyTransfer layer is noticeable, especially in large solid areas
DTG Printingphotographic artwork, gradients, short runs and cotton-rich garmentsBest on cotton-rich surfaces; synthetics need specialized systems and testingLow setup suits short runs; machine time can make large runs less efficientOften soft on cotton when pretreatment and ink deposit are well controlled
Sublimation Printingall-over sportswear, jerseys, performance apparel and permanent full-color polyester graphicsBest on white or light, high-polyester fabricEfficient when panels and repeat layouts are planned around transfer and cutting workflowNo raised print film because dye becomes part of compatible polyester fiber
Puff Printingstreetwear logos, bold type, selected details and tactile raised graphicsWorks well on stable cotton-rich garments after cure testingSetup resembles screen printing, so repeated quantities usually improve economicsRaised and tactile; intentionally more dimensional than a flat print
Water-Based Printingsoft-hand cotton streetwear, fashion graphics and designs where fabric feel mattersStrongest on suitable cotton-rich fabrics; discharge performance depends on the garment dyeScreen-based setup favors planned runs; shop control is important because ink can dry in the screenOften softer than a heavy conventional surface deposit when designed correctly
Reflective Printingstreetwear accents, logos, night-visibility fashion details and contrast effectsWorks on many garments after adhesion, heat and migration testingEconomics depend on whether the effect is screen-printed or transferredVaries from ink-like to transfer-film feel depending on the system

For a close decision, make the same artwork on the same production fabric using the two strongest candidates. Compare color, detail, hand, stretch, wash result, setup cost and reorder economics. A physical side-by-side test is more useful than choosing a printing method from marketing claims.

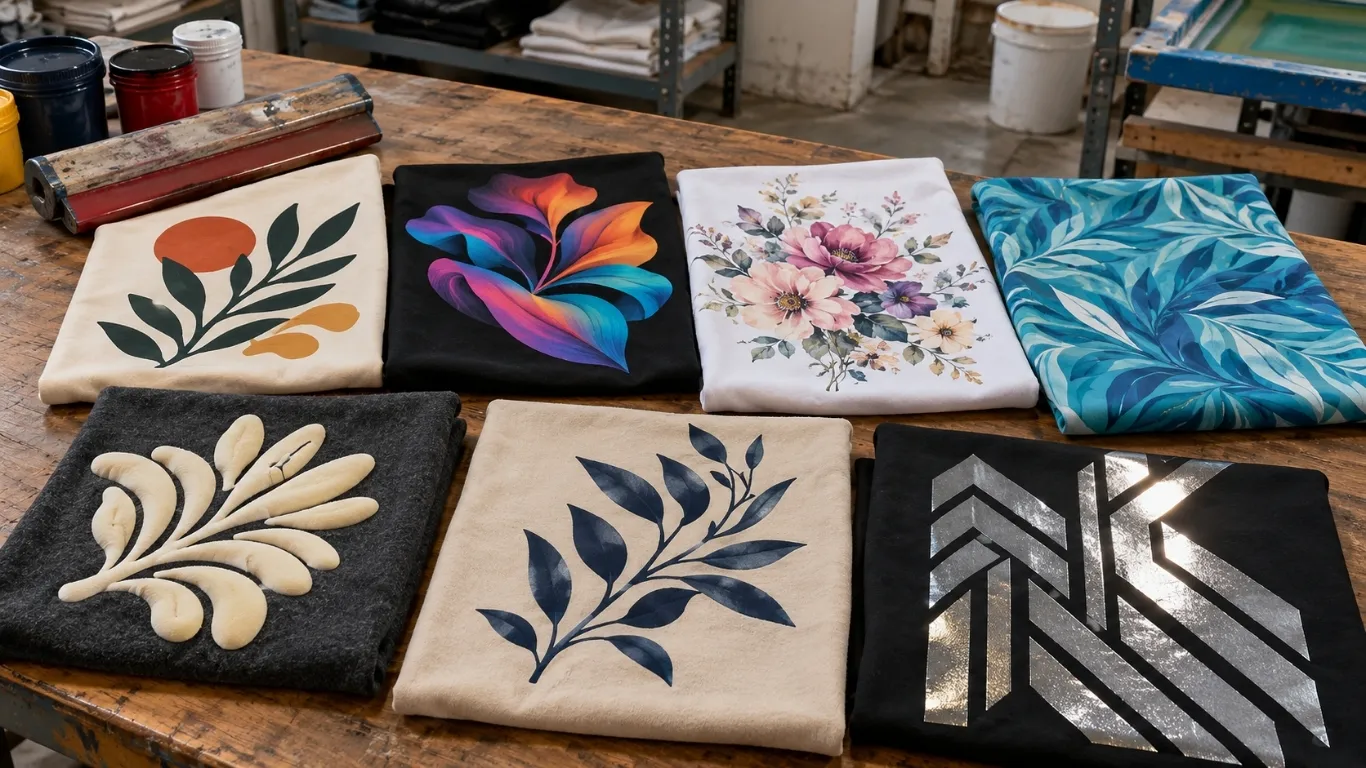
Printing side by side screen dtf dtg sublimation and special effect samples for custom clothing production
side by side screen DTF DTG sublimation and special effect samples.
Decision framework

How to Choose a Printing Method

Use six questions to narrow a printing method before you request quotes.

  1. What is the exact fabric? Cotton, polyester, nylon, fleece, stretch and coated fabrics behave differently.
  2. What does the artwork contain? Spot colors, photographs, gradients, tiny text and large solids do not impose the same demands.
  3. What should the decoration feel like? Soft, raised, reflective, film-like or nearly absent are different design goals.
  4. What is the first quantity and likely reorder quantity? Setup-heavy and digital methods scale differently.
  5. How will the product be used? Streetwear, sportswear and uniforms experience different stretch, abrasion and washing.
  6. Can you approve a sample? Never scale a new fabric/method combination from a mockup alone.

Once these questions are answered, a factory can explain why a method fits instead of simply quoting the machine it prefers to sell.

Pricing logic

How Clothing Printing Cost Is Calculated

Printing cost is built from setup, materials, machine or operator time and the risk/complexity of the actual garment. The outer dimensions of the artwork are only one variable. A simple one-color left-chest mark, a large full-color back graphic and an all-over cut-and-sew design cannot share one honest universal price.

Useful costing formula

Per-garment decoration = setup allocated across the run + materials/ink + application time + special process + testing/reject allowance + extra placements. Add the custom garment, branding, packaging and delivered freight for the final landed cost.

When comparing quotations, keep artwork, dimensions, fabric, garment color, quantity and placements identical. If a supplier prices before seeing those details, treat the number as provisional. Transparent printing quotations explain what changes the price so brands can simplify a design intelligently when needed.

Order planning

Printing MOQ and Small Production Runs

CLOTHINGMANUFACTURER.US states the clothing manufacturing minimum as 10 MOQ per color per style and up to 3 sizes. That does not mean every printing method has identical cost efficiency at ten pieces. Screen setup, transfer preparation, machine time and all-over panel planning create different economics.

A startup should separate technical MOQ from economic quantity. Technical MOQ tells you the smallest program the factory will accept. Economic quantity shows where setup begins to spread over enough units to reduce the decoration cost per piece. Ask for multiple quantity breaks instead of assuming the minimum is automatically the best value.

For early collections, minimize unnecessary colorways and decoration versions. Use the small run to validate fit, fabric, artwork and customer demand, then reorder from an archived specification. This makes low-quantity printing a learning tool rather than only a compromise on price.

Compatibility

Fabric and Printing Compatibility

Printing begins with fabric chemistry. Cotton absorbs and bonds differently from polyester. Fleece has texture. Nylon can be heat-sensitive or hard to adhere to. Garment dyes and coatings can interfere with inks and adhesives. The same artwork therefore needs different engineering across products.

FabricPossible printing routesMain check
Cotton jerseyScreen, DTG, DTF, water-based, puffExcellent base for many methods; surface smoothness still matters.
French terry / fleeceScreen, DTF, puff, selected DTG/water-basedTest texture, pressure, detail and seams.
PolyesterSublimation, DTF, selected screen/reflectiveCheck heat response and dye migration.
Poly/spandexSublimation or flexible tested systemsStretch recovery and heat are critical.
NylonSpecialist transfers/inksAdhesion and press temperature require exact testing.
Coated fabricsSpecialist onlyCoatings can block adhesion or react to heat.

If your supplier changes fabric article or dye lot, repeat the checks that could materially affect the printing result. A method approved on one black polyester should not automatically be assumed safe on every black polyester.

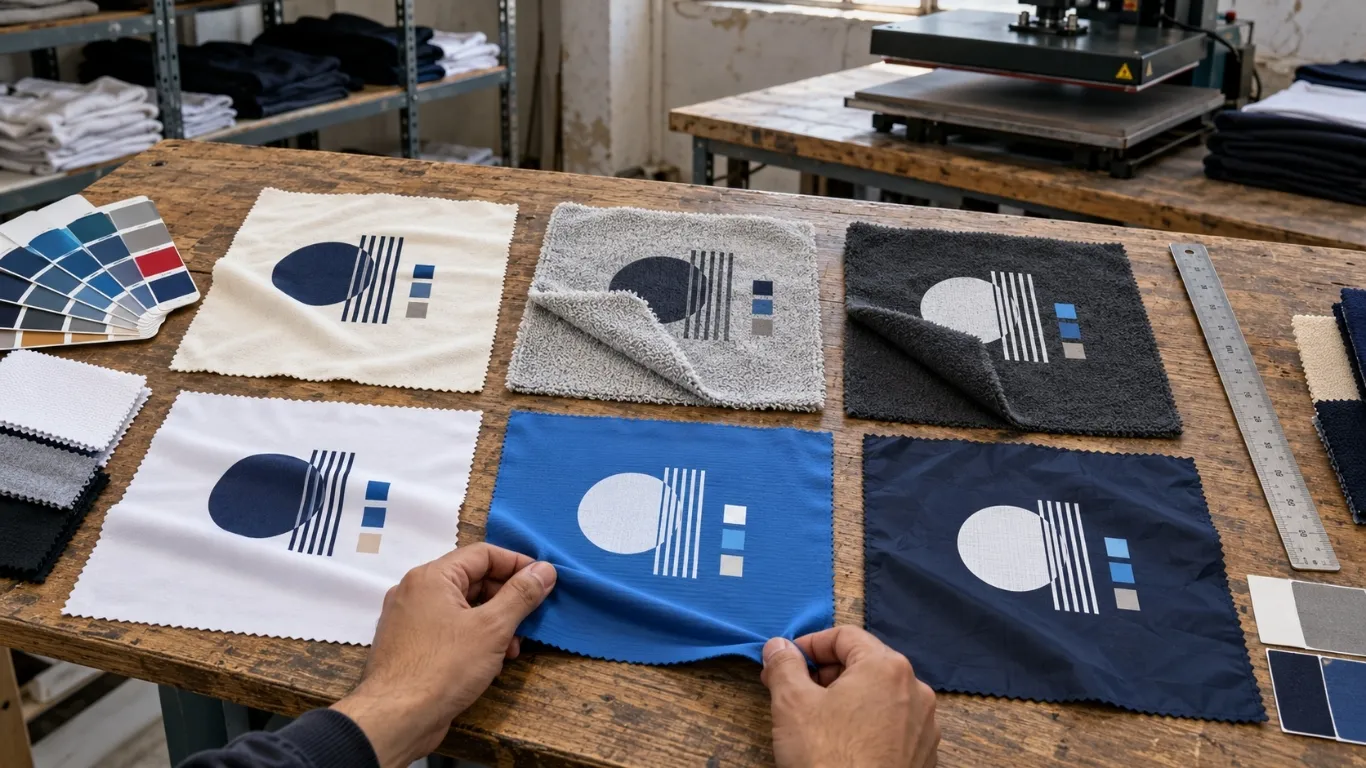
Printing fabric swatches prepared for print compatibility tests for custom clothing production
fabric swatches prepared for print compatibility tests.
Prepress

Artwork Requirements for Clothing Printing

Production artwork needs more information than a logo file. For reliable printing, give the supplier final dimensions, placement measurements, color references, garment color and the approved file version. Vector art is preferred for logos and spot graphics; high-resolution raster art is suitable for photographic work when it is supplied at final size.

Test fine details at physical size. A one-pixel line can look obvious on a monitor but disappear in an ink, transfer or textile surface. Negative space, small text and gradients should be evaluated against the chosen method. For all-over printing, the artwork must also account for panel templates, seams, bleed and size grading.

Production-safe brief: identify the method, artwork version, width/height, color target, exact garment reference, placement measurement and approval status in one document.
QC

Printing Quality Control for Custom Clothing

Printing quality is checked in stages: artwork and setup before production, first-off pieces at the start, periodic samples during the run and finished garments before packing. The control points differ by method, but the principle is the same: catch process drift while it can still be corrected.

  • Confirm final artwork version and dimensions.
  • Measure placement against fixed garment reference points.
  • Compare color and opacity with the approved sample.
  • Check edges, detail, registration and contamination.
  • Validate cure, adhesion, stretch or reflective response as relevant.
  • Wash-test new production combinations.
  • Keep a golden decorated sample for reorders.

A print that looks correct immediately can still fail later if cure or adhesion is wrong. Quality approval therefore includes the behavior of the complete garment, not only a photograph taken at the machine.

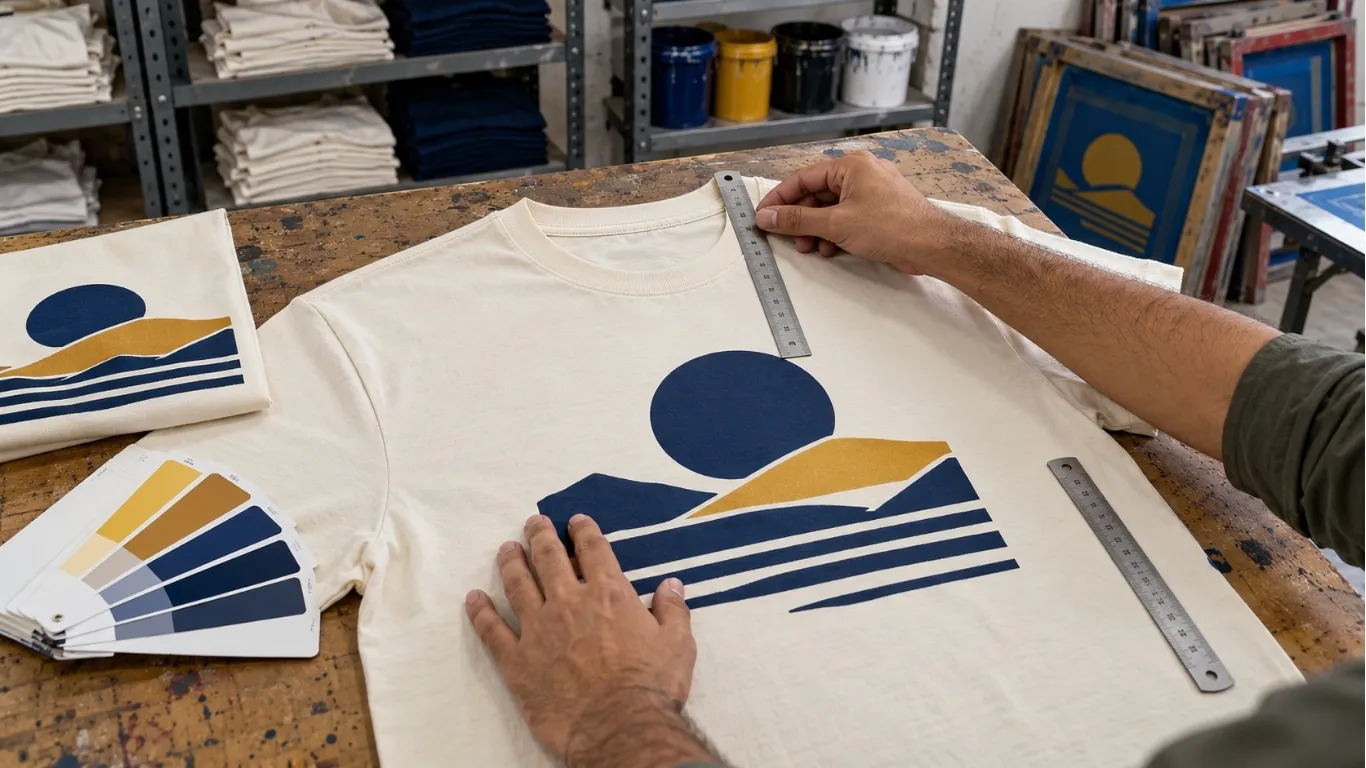
Printing quality control close up of printed garment placement and finish for custom clothing production
Quality control close up of printed garment placement and finish.
Brand strategy

Printing for Startup Clothing Brands

A startup does not need every decoration method in its first collection. It needs a repeatable product that customers understand and that leaves enough margin to reorder. Choose printing after the fit and fabric direction are clear, then use the artwork to decide whether digital flexibility, screen economics or a special effect creates real value.

Budget for sampling. A strong first sample tells you more than twenty mockups because it reveals scale, hand feel, fabric interaction, color and wash behavior. Once approved, document it. When the first drop sells, the saved specification makes reordering faster and reduces the risk that a second batch looks different.

Think about growth from the start. If the brand expects a ten-piece test to become a 300-piece reorder, ask whether the initial printing method still makes sense at the higher quantity. Sometimes the right plan is to prove artwork with one process and deliberately convert later when setup economics favor another.

Deep production knowledge

Advanced Printing Production Notes

The details below help buyers evaluate printing beyond surface-level method descriptions.

1. Design for the production surface

The decoration system should be engineered as part of the garment rather than chosen after the product is finished. A garment is not a flat sheet of paper. Rib, fleece nap, seams, pockets, drawcords and zippers create pressure differences and positioning limits. Strong artwork can be adapted around those realities without losing its identity. During development, map the printable zone from garment measurements rather than scaling a mockup by eye. This also protects consistency when a design is graded across sizes. This principle applies across digital, screen-based, transfer and special-effect methods, although the production solution will differ.

2. Separate visual size from ink coverage

The decoration system should be engineered as part of the garment rather than chosen after the product is finished. Two graphics with the same outer dimensions can have very different production cost and feel. A thin-line illustration may cover only a small percentage of the area, while a solid rectangle fills nearly all of it. When comparing quotes, state both the finished dimensions and show the final artwork. This prevents a supplier from pricing a low-coverage draft and then changing the price after the final file arrives. This principle applies across digital, screen-based, transfer and special-effect methods, although the production solution will differ.

3. Use placement tolerances that reflect sewing reality

The decoration system should be engineered as part of the garment rather than chosen after the product is finished. Garment panels move slightly during sewing and finished garments are not identical rigid objects. For production, measure decoration from repeatable reference points such as center front, neck seam, side seam or pocket edge, and agree a reasonable tolerance. Overly precise instructions that ignore normal garment variation can create unnecessary rejects without producing a visibly better product. This principle applies across digital, screen-based, transfer and special-effect methods, although the production solution will differ.

4. Plan dark garments before light garments

The decoration system should be engineered as part of the garment rather than chosen after the product is finished. Dark bases often require an underbase, blocker, extra white, different pretreatment or additional cure control. This can change hand feel and cost. A collection that uses one graphic across white, black and polyester colorways should be tested as separate production conditions rather than assuming the light-garment recipe can simply be copied. This principle applies across digital, screen-based, transfer and special-effect methods, although the production solution will differ.

5. Control color with physical standards

The decoration system should be engineered as part of the garment rather than chosen after the product is finished. A hex code is designed for screens, not textile ink. For important brand colors, use a physical target or a standardized color reference and approve a real strike-off. Record the approved mix or digital workflow with the fabric article. This is especially important when a reorder may happen months later or when the same logo appears across print, embroidery, labels and packaging. This principle applies across digital, screen-based, transfer and special-effect methods, although the production solution will differ.

6. Sample the combination, not only the components

The decoration system should be engineered as part of the garment rather than chosen after the product is finished. A fabric swatch can pass, and a print on another fabric can pass, yet the final combination can still fail. Heat response, stretch, surface finish and dye behavior are specific to the actual garment material. A reliable sample uses the production fabric, production color, intended decoration method and realistic artwork coverage. This principle applies across digital, screen-based, transfer and special-effect methods, although the production solution will differ.

7. Cost the whole decoration program

The decoration system should be engineered as part of the garment rather than chosen after the product is finished. Brands often compare only the headline price per print. A better calculation includes setup, films or screens, multiple placements, special effects, sampling, expected reject allowance, labels and any added production time. Once these are combined with the garment and freight, the brand can compare landed unit economics rather than isolated print charges. This principle applies across digital, screen-based, transfer and special-effect methods, although the production solution will differ.

8. Keep a golden decoration reference

The decoration system should be engineered as part of the garment rather than chosen after the product is finished. When a print is approved, retain a physical sample with the final dimensions, placement, color and hand feel. Photographs are valuable for communication but cannot show texture or opacity accurately. A retained approved sample gives production and quality teams a concrete standard during reorders and helps resolve disagreements objectively. This principle applies across digital, screen-based, transfer and special-effect methods, although the production solution will differ.

9. Think about retail use before choosing a finish

The decoration system should be engineered as part of the garment rather than chosen after the product is finished. A display piece, gym garment, children’s item, uniform and streetwear hoodie experience different abrasion, stretch, washing and heat. Method choice should match the end use. The most visually dramatic sample is not automatically the best production decision if it becomes uncomfortable, difficult to wash or inconsistent at scale. This principle applies across digital, screen-based, transfer and special-effect methods, although the production solution will differ.

10. Avoid unsupported sustainability claims

The decoration system should be engineered as part of the garment rather than chosen after the product is finished. Water use, energy, chemistry, transfer waste and garment longevity all matter. A method name alone does not prove that a finished product is environmentally preferable. If sustainability is part of marketing, request specific documentation for inks, fabrics and processes and use narrow factual language instead of broad claims that cannot be substantiated. This principle applies across digital, screen-based, transfer and special-effect methods, although the production solution will differ.

11. Document changes between sample rounds

The decoration system should be engineered as part of the garment rather than chosen after the product is finished. If the print width, placement, ink, garment color or fabric changes, update the written specification immediately. Do not rely on a chat message buried in a long thread. Versioned artwork and a short approval log help prevent an earlier file from being used accidentally during bulk production. This principle applies across digital, screen-based, transfer and special-effect methods, although the production solution will differ.

12. Design a scalable decoration system

The decoration system should be engineered as part of the garment rather than chosen after the product is finished. A method that works beautifully for ten pieces may become slow or costly at one thousand, and a high-setup method can be inefficient for frequent tiny drops. If the brand expects growth, discuss the likely volume path early. Sometimes the right strategy is to launch with one process and deliberately convert to another after the artwork and demand are proven. This principle applies across digital, screen-based, transfer and special-effect methods, although the production solution will differ.

24 buyer decisions

Buyer Production Workbook

This workbook turns decoration selection into a practical product-development checklist. Work through the decisions before bulk approval and keep the final answers with the style specification.

1. Define the product before the decoration

Start with the garment silhouette, fabric composition, GSM, color and intended retail position. Decoration should support a product that already makes sense. If the base garment is still changing, every sample can become obsolete because surface texture, shrinkage, color and seam position affect the approved result. Lock the important garment variables first, then compare decoration routes against the same product. This creates a useful sample instead of a moving target and makes supplier quotations comparable.

2. Set the real artwork size

Mockups often make graphics look proportionally correct without stating dimensions. Convert the visual concept into finished width and height on the garment. Check the smallest and largest garment sizes so one placement does not become oversized on XS and undersized on 3XL. Decide whether all sizes use one physical dimension or whether artwork scales by size group. Write that decision into the technical specification before sampling.

3. Choose repeatable placement references

Measure from construction points that exist consistently in production: neck seam, center front, shoulder seam, pocket edge or side seam. Avoid instructions such as “a little lower” or “centered like the mockup.” A supplier needs a numeric target and a sensible tolerance. For asymmetrical garments, confirm whether placement follows the garment center, panel center or a visual feature. These small decisions prevent drift across a run.

4. Separate color approval from monitor color

A phone or laptop is useful for communication but should not be the final authority for brand-critical color. Device brightness, color profile and ambient light change what a digital preview looks like. Use a standardized reference or a physical approved sample when color is important. Record the target together with the garment base color because identical ink or transfer output can appear different on white, cream, black or saturated fabric.

5. Plan dark colorways independently

A design that works on a white garment may need an underbase, blocker, extra white layer or different material on black. That can change feel, opacity, cure conditions and cost. Treat light and dark colorways as separate production conditions even when the visible artwork is identical. If the collection uses several dark colors, test the most technically difficult fabric first instead of assuming one approved result covers the entire palette.

6. Decide how much surface coverage you really need

Large solid areas can make a garment hotter, stiffer or more expensive and can increase production risk. Negative space often improves comfort while preserving visual impact. Before approving a large block graphic, compare a full-solid version with a version that lets the fabric show through. This is a design decision as much as a factory decision. The best result balances visual weight, tactile feel, durability and realistic manufacturing control.

7. Use the sample to prove the exact combination

A fabric swatch, an artwork proof and a decoration test on another garment are not equivalent to a finished production sample. The valuable test uses the intended fabric article, garment color, construction and full-size artwork. That sample shows interaction between heat, pressure, stretch, seams and surface finish. Keep it after approval because it becomes the physical reference that future bulk work and reorders can be judged against.

8. Ask what changes at higher volume

A method that is convenient for a ten-piece launch may not be the most efficient route at several hundred units. Ask the supplier how setup, machine speed, material handling and labor change as quantity grows. If a later conversion to another route could preserve appearance while improving unit economics, plan that transition in advance and retain the approved visual target. Growth should not force the brand to rediscover its decoration standard from zero.

9. Cost every placement separately

Front, back, sleeve, hood, leg and pocket work each add handling. Difficult positions can also require special pallets, manual alignment or slower production. When a quotation bundles everything into one unexplained amount, it is hard to optimize. Request a breakdown by placement so you can decide which element creates enough visual value to justify its cost. Removing one low-impact placement can sometimes protect margin without changing the identity of the product.

10. Model landed cost instead of decoration-only cost

A low decoration price can be misleading if the garment, labels, packaging, freight or duties are excluded. Build one landed unit calculation using the same assumptions for every supplier. Include sample development and setup when estimating the first run, then model reorders separately because setup may change. This view helps a brand set retail price and gross margin before production rather than discovering after delivery that the collection cannot support its planned marketing or wholesale structure.

11. Agree what counts as a defect

Quality discussions are easier when appearance standards are written before bulk work. Define obvious reject issues such as peeling, incomplete cure, severe misplacement, contamination, broken fine detail or color outside the approved tolerance. Also distinguish normal textile variation from actual defects. A garment is flexible material, not a machined metal part. Reasonable tolerances protect quality while preventing arguments over tiny variation that customers would never notice.

12. Test the product after care

A decoration should be evaluated after the garment has been washed and dried in a realistic way. Check adhesion, cracking, fading, migration, stretch recovery and surface feel. If a special effect is central to the design, verify that the effect remains visible after care. Use the result to create the final care-label recommendation for the complete item. Do not assume a generic wash instruction is correct for every combination of fabric, trims and decoration.

13. Keep a controlled approval trail

Name files clearly and record which version is approved. A supplier should not have to search through dozens of chat images to guess whether V2 or V5 is final. Store artwork, dimensions, placement notes, color references, sample photographs and approval date together. When a change is made, supersede the old specification. Good version control is inexpensive and prevents one of the most common causes of production mistakes: using an earlier file that still looks plausible.

14. Design around garment construction

Pockets, zippers, drawcords, ribs, seams and thick hems create uneven surfaces. A decoration placed directly over them may lose pressure, distort or become difficult to align. During design, mark these construction features on the flat sketch and decide whether the graphic avoids them, intentionally crosses them or is applied before sewing on a flat panel. Planning around construction produces a cleaner result than forcing a finished-garment process into a location it cannot handle consistently.

15. Plan for size grading

A fixed 30 cm graphic can dominate a small garment and look modest on a very large one. Decide whether the collection accepts that difference or uses multiple artwork sizes. If scaling is required, define size groups and separate production files. Avoid uncontrolled “scale proportionally” instructions because placement, line weight and legibility can change when artwork is reduced. The brand should approve the smallest version as carefully as the hero sample size.

16. Protect fine text and negative space

Small counters inside letters, thin outlines and tight gaps are vulnerable in many textile processes. What is legible at 200 percent zoom may close or blur on fabric. Print the artwork at physical size on paper as a first check, then ask the supplier about minimum feature size for the chosen system. If detail must be simplified, preserve the visual hierarchy and brand character rather than waiting for production to simplify it accidentally.

17. Use special effects selectively

Raised, reflective, metallic and other effects attract attention because they are different from the base surface. Using them everywhere can make a garment heavy, expensive or visually noisy. Decide which part of the artwork benefits most from the effect and keep supporting elements simpler. This also reduces process complexity and makes quality easier to control. A small technical accent can communicate premium development more effectively than covering the entire design with a special material.

18. Evaluate comfort as part of quality

Customers experience the inside and outside of a garment. Large surface films, thick deposits or stiff areas can affect drape and breathability even when the artwork looks excellent in a photo. For products worn during exercise or in warm climates, comfort deserves extra weight in the method decision. Try the finished sample on a body, move in it and feel the decorated area from the inside. Product quality includes wear experience, not only visual sharpness.

19. Think about production sequence

Decoration can happen on fabric, cut panels or finished garments. It may also interact with garment dye, washing, embroidery and heat-sensitive trims. The order of operations changes risk. For example, a wash after decoration can distress a graphic, while a decoration after a wash must cope with the final treated surface. Map the sequence during sampling and keep it the same in bulk unless a deliberate change is approved. Sequence is part of the production recipe.

20. Plan personalized names or numbers separately

Personalization introduces file management and sorting risk even when the base artwork is unchanged. Provide a clean data list, consistent spelling rules, size mapping and a proof process. Decide what happens if a name is unusually long and whether numbers have fixed height. After production, personalized pieces should be checked against the order data before packing. The more unique units in a run, the more important controlled labeling and bundle tracking become.

21. Check packaging contact with the decorated surface

Freshly finished decoration can be damaged by excessive heat, pressure or folding if it is packed too soon. Some raised or tacky surfaces can mark when pressed against another garment. Confirm that finished pieces are cooled or cured fully before folding and that the fold line does not permanently crease an important graphic. Packaging is the final part of production, and careless packing can damage work that passed every earlier quality check.

22. Prepare a reorder package

A reorder should begin with the archived approved specification, not a new interpretation of an old photo. Keep the garment pattern/version, fabric article, artwork file, dimensions, placement, color reference, decoration system and approved sample linked under one style code. If any component is unavailable, identify the substitution before production and test it. This approach shortens communication and gives the factory a clear standard to reproduce instead of asking the team to remember what happened months earlier.

23. Make claims only as strong as the evidence

Avoid promising lifetime durability, safety performance, sustainability or exact wash counts unless the finished product has evidence that supports the statement. Marketing language should match the actual material and test conditions. A decorative reflective effect, for example, is not automatically certified safety equipment. Clear claims protect the brand and also make supplier conversations more precise because everyone knows what performance must actually be demonstrated.

24. Review the first production pieces in context

Do not judge the first approved bulk piece only under factory lighting. Look at the complete garment, check it on-body when possible, and compare it with the approved sample. Confirm labels, seam alignment, garment shade and decoration together. If the product will be photographed for e-commerce, consider how the effect behaves under studio light as well. A technically acceptable detail can still look wrong when the whole garment is viewed as a retail product.

25. Build a launch sample scorecard

Score the approved sample against the things that matter to your brand: artwork accuracy, placement, color, feel, comfort, wash result, garment fit, label quality and landed cost. Use a simple pass/fail or weighted score rather than relying on excitement when the first physical piece arrives. If two suppliers are being compared, apply the same scorecard to both. This creates a record of why a sample was approved and helps future team members understand which characteristics are non-negotiable.

26. Use a change budget during development

Every new colorway, artwork version, placement or special effect adds development time and possible setup. Set a deliberate limit on how many variables can change after the first sample. When feedback arrives, group revisions into one controlled round instead of sending daily micro-changes. This shortens the approval loop and reduces the chance that one correction is built on an outdated version. A disciplined change process also makes it easier to understand which revision caused an improvement or a new problem.

27. Plan photography with the physical effect

Raised, glossy, matte and reflective surfaces can behave very differently under e-commerce lighting. Before campaign production, photograph the approved sample under the type of light your brand will use. Check whether highlights hide detail, whether reflective elements flare too strongly and whether dark-on-dark work remains visible. This does not change factory quality, but it can change how the customer perceives the product online. Product development and content production should therefore share the same approved reference rather than working from separate mockups.

28. Keep supplier questions specific

A useful technical question names the garment and risk: “Will this black polyester bleed into the light graphic at your normal cure temperature?” is better than “Is this method durable?” Specific questions encourage specific evidence such as a strike-off, wash test or material data. Ask the supplier what it would test, what failure would look like and what alternative it would recommend if the first route fails. This turns sourcing into collaborative problem solving and makes vague sales answers easier to identify.

29. Set a deadline backward from launch

The decoration stage needs room for art review, sampling, approval, bulk work, quality checks and possible correction. Work backward from the campaign or retail launch date and reserve a buffer rather than scheduling every step at the fastest theoretical speed. If a special material has to be ordered, include its lead time before promising a launch publicly. A realistic calendar gives the brand the freedom to reject a poor sample without immediately creating a crisis.

30. Review margin again after the sample

The first accurate cost often appears only after fabric, artwork size, placements and finish are finalized. Recalculate the landed unit cost at that point and compare it with the planned retail and wholesale prices. If margin is too thin, simplify the product before bulk approval rather than hoping sales volume will fix the economics later. Adjusting one low-value placement, fabric option or packaging component at sample stage is usually less painful than discounting a finished collection that was expensive to produce.

For broader technical background, see the textile decoration overview as an external reference, then validate the actual method with your production supplier and fabric.

Answers

Clothing Printing FAQs

What is the best printing method for clothing?

There is no single best method. Screen printing is strong for repeat spot-color work, DTF is flexible for detailed transfers across many fabrics, DTG suits photographic cotton-rich work, sublimation is excellent for polyester all-over graphics, while puff, water-based and reflective printing serve specific visual and tactile goals. The final decision should always be verified on the exact production garment when fabric or artwork changes.

What is the cheapest clothing printing method?

The cheapest method changes with artwork, size, colors, fabric and quantity. Screen setup can make screen printing expensive for tiny runs but efficient at volume. Digital methods can have lower setup but higher per-garment machine or material cost. Compare the landed product at your real order quantity. The final decision should always be verified on the exact production garment when fabric or artwork changes.

Which printing method is best for 10 pieces?

A ten-piece clothing order can use several methods depending on the design. Digital options can be efficient at low quantity, while screen-based methods may carry more setup. CLOTHINGMANUFACTURER.US states its clothing MOQ as 10 MOQ per color per style and up to 3 sizes; method economics are quoted separately. The final decision should always be verified on the exact production garment when fabric or artwork changes.

Which printing method lasts the longest?

Durability depends on the fabric/process combination and correct production controls. Properly executed screen printing, sublimation, DTF, DTG and other methods can all perform well in the right use. Ask for a wash-tested sample instead of choosing only from a generic durability ranking. The final decision should always be verified on the exact production garment when fabric or artwork changes.

What is best for heavyweight streetwear?

Heavy cotton T-shirts, fleece hoodies and sweatshirts can work with screen, DTF, DTG, puff, water-based and reflective systems depending on the graphic. Surface texture, seams and the desired hand feel should guide the choice. The final decision should always be verified on the exact production garment when fabric or artwork changes.

What is best for sportswear?

Polyester sportswear often favors sublimation for all-over artwork. DTF, reflective systems and selected screen inks can also work after heat and dye-migration testing. The exact fabric should be tested. The final decision should always be verified on the exact production garment when fabric or artwork changes.

How do I calculate printing cost?

Add allocated setup, ink/transfer material, machine or application labor, special-process requirements, testing/reject allowance and each additional placement. Then add the garment, labels, packaging and freight to reach landed product cost. The final decision should always be verified on the exact production garment when fabric or artwork changes.

Does more print color always mean more cost?

Not in the same way for every method. Screen printing typically adds setup for additional spot colors. Digital processes can reproduce many colors without one physical screen per color, but ink coverage and machine time still affect cost. The final decision should always be verified on the exact production garment when fabric or artwork changes.

What is a print underbase?

An underbase is a light or blocker layer below the visible artwork, commonly used to keep colors bright on dark garments or to manage dye migration. It influences opacity, hand feel, registration and cost. The final decision should always be verified on the exact production garment when fabric or artwork changes.

Should a clothing brand use one printing method for every product?

Usually not. A brand can maintain visual consistency while using the method best suited to each garment. The important part is consistent artwork, color targets, placement standards and quality approval. The final decision should always be verified on the exact production garment when fabric or artwork changes.

Can you combine print methods on one garment?

Yes. Flat screen print can be combined with puff details, reflective accents can sit alongside standard decoration, and embroidery can be used with printing. The factory should plan the sequence so heat and handling do not damage earlier work. The final decision should always be verified on the exact production garment when fabric or artwork changes.

What files should I send for custom printing?

Send vector artwork where possible for logos, high-resolution raster files for photographic work, final print dimensions, garment color, color references, and a placement diagram. Clearly label the approved version. The final decision should always be verified on the exact production garment when fabric or artwork changes.

What is the difference between DTF and DTG?

DTF prints a transfer on film and heat-applies it to the garment. DTG inkjets textile ink directly onto a prepared garment. DTF is versatile across many fabrics; DTG is strongest on suitable cotton-rich surfaces and is often chosen for direct photographic printing. The final decision should always be verified on the exact production garment when fabric or artwork changes.

What is the difference between screen printing and DTF?

Screen printing uses mesh stencils and direct ink deposition; DTF uses a printed adhesive-backed transfer. Screen printing has more physical setup per color but can be efficient for repeat volume. DTF is flexible for complex color and shorter runs. The final decision should always be verified on the exact production garment when fabric or artwork changes.

Can printing be done on polyester?

Yes, but polyester requires dye-migration and heat testing. Sublimation is designed for suitable polyester, while other methods need compatible inks, blockers, transfers or lower-temperature processes. The final decision should always be verified on the exact production garment when fabric or artwork changes.

Can printing be done on fleece?

Yes. Fleece and French terry can be decorated, but surface texture and garment thickness can affect fine detail, pressure and ink/transfer contact. Test on the exact production fabric. The final decision should always be verified on the exact production garment when fabric or artwork changes.

What is a soft-hand print?

Soft hand means the decoration feels relatively integrated with the fabric rather than like a heavy surface layer. Water-based systems, selected screen techniques and DTG on suitable cotton can produce soft results, but artwork coverage and ink deposit matter. The final decision should always be verified on the exact production garment when fabric or artwork changes.

Why do printed garments crack?

Cracking can come from under-cure, brittle chemistry, excessive deposit, incompatible fabric stretch or aging. Diagnose the production system rather than assuming all printing of that type will crack. The final decision should always be verified on the exact production garment when fabric or artwork changes.

Why does a white print turn pink on polyester?

This is often dye migration: polyester dye moves into the decoration under heat. Low-cure systems, blockers or another decoration route may be needed after testing. The final decision should always be verified on the exact production garment when fabric or artwork changes.

How should a startup choose a method?

Start with the fabric and artwork, then compare hand feel, setup, quantity and reorder plan. Approve one sample on production fabric and keep the first collection focused enough that quality and demand can be measured. The final decision should always be verified on the exact production garment when fabric or artwork changes.

How many reference images should a long printing guide use?

Use enough original images to prove the process and help the reader: finished result, close-up, production step, fabric test and QC are useful. Replace generic placeholders with real factory imagery before publication. The final decision should always be verified on the exact production garment when fabric or artwork changes.

Do printing pages need FAQ schema?

FAQ content can be structured for users and represented in schema when it accurately matches visible content and your SEO/schema setup. Avoid duplicate schema output from multiple plugins or hard-coded sources. The final decision should always be verified on the exact production garment when fabric or artwork changes.

Should I publish exact fixed print prices online?

Only if your production variables truly support fixed pricing. Custom apparel decoration often changes with artwork size, fabric, colors, placements and quantity, so a transparent cost model can be more accurate than a universal price that becomes misleading. The final decision should always be verified on the exact production garment when fabric or artwork changes.

What should a print sample approval include?

Approve artwork version, dimensions, placement, garment fabric/color, visible color, hand feel, opacity, cure or adhesion, and any special effect. Keep the physical approved piece or strike-off as a reference. The final decision should always be verified on the exact production garment when fabric or artwork changes.

How do I make printing reorders consistent?

Archive final artwork, measurements, color standards, material/ink system, press/cure parameters where relevant, fabric article and a golden decorated sample. Repeatability comes from records, not memory. The final decision should always be verified on the exact production garment when fabric or artwork changes.

Where does printing fit in clothing manufacturing?

Decoration is normally planned during product development and can occur on panels or finished garments depending on the method. It interacts with pattern, fabric, sewing, washes and final QC, so it should not be treated as an isolated last step. The final decision should always be verified on the exact production garment when fabric or artwork changes.

From method selection to finished garment

Need Help Choosing a Printing Method?

Send your artwork, garment type, fabric/GSM, colors, quantity and destination. We can review the practical method options as part of your custom apparel program.

10 MOQ per color per style and up to 3 sizes. · info@clothingmanufacturer.us